Wifi extenders expand the wifi signal in our homes or offices and allow us to use wifi connection in larger areas. On this page, we will talk about device setup, what you need to pay attention to and some important points to know. The installation and user interfaces of wifi extender devices are similar to each other. So, regardless of your brand, the procedures are the same.
That’s why we explain our page with pictures on any brand and model. You can set up your own model by taking it as an example. In other matters, it is the same for all range extenders. Email me: wifiextenderexpert@gmail.com
How to setup your extender (Step by Step)
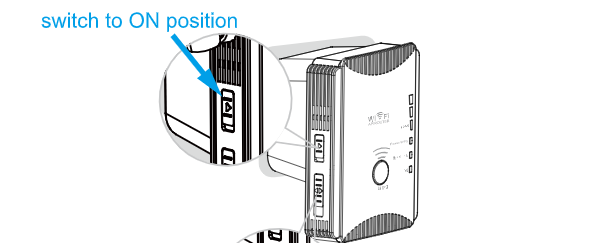
Step 1: Turn on the device by pressing the power button, also make sure that the extender start button is on. Wait until the device turns solid green when plugged in. And put the device near your router.
Step 2: Open the wifi part of your computer and connect to the relevant wifi network from there. It is given as wireless N in the image. You will connect to your own wifi network.

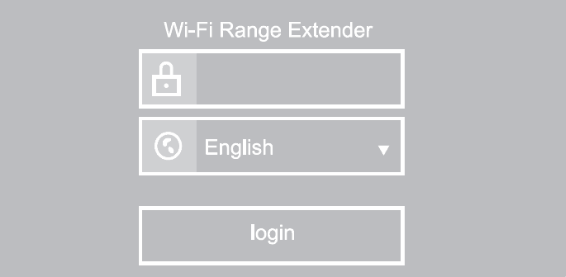
Step 3 : In order to make the necessary configuration settings, you must first log in to the user interface of the device via your web browser. In order to make this login, the default user name and password are required. You can see this information on the label on the back of your device. Each brand has its own unique management login information. We are writing below as an example, but it is different for you, see the booklet on the back or side of your device.
- ip address :192.168.1.1
- username and password : admin
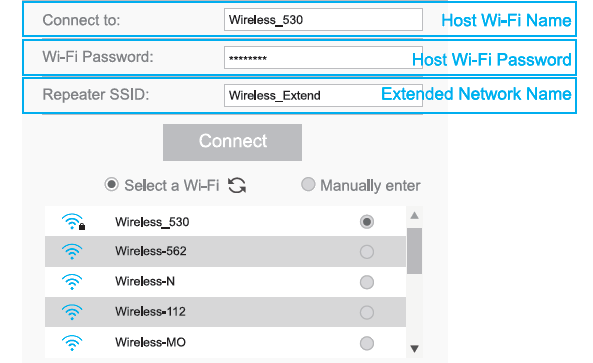
Step 4: Enter your router’s wifi network and enter your password. If you want to use the same network name as the router with a different SSID, you can enter a new network name. When you verify your wireless connection, the Wifi LED will turn solid. This indicates that the connection was made successfully.
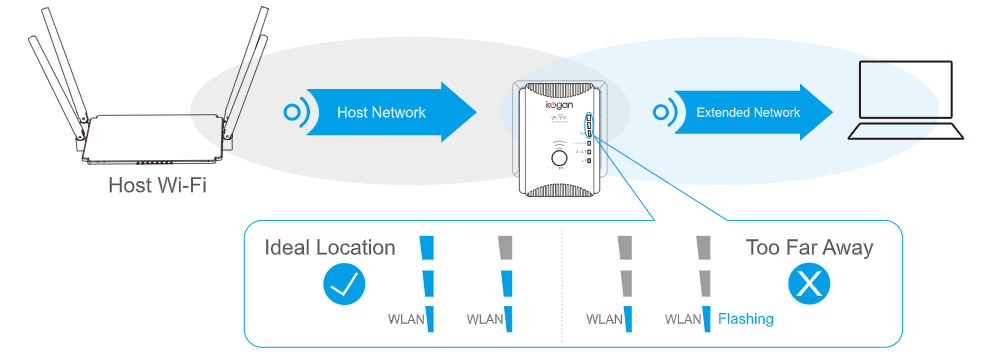
Step 5 : Now that the connection is established and the WLAN LED is on, the device is working and there is no problem. Now we made the connection while we were next to the router. Take the wifi range extender to where the dead zone in your home is, but it should definitely receive the wifi signal. If the wifi signal is too weak, your connection may break, so you should move the device closer to your router where the signal is weak.
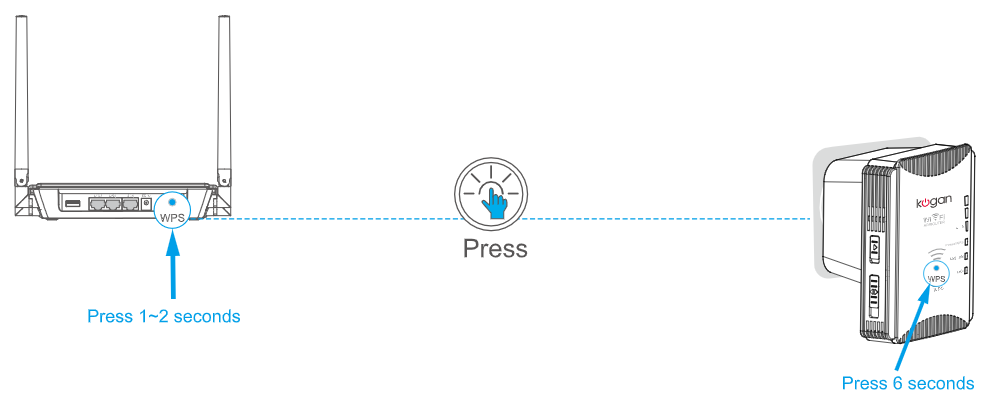
HOW TO SETUP YOUR WI-FI EXTENDER WITH WPS (EASILY)
If you have bought a new device or do not want to deal with it and want to set it up easily, we can say that connecting with WPS is for you. What you need to do here is very simple; Press and hold the WPS button on your range extender for 6 seconds, then press the WPS button on the router. The device will reboot itself and the WLAN led will be solid. This is how your connection is completed.
Troubleshooting ans Important Notes
I wanted to write for you what you can do for your device connection problems.
- If you have a problem with the device, first turn it on and off.
- If you are having a wifi connection problem, either you entered your password incorrectly or the wifi signal is weak because you put the range extender device too far from the router.
- For device problems and connection problems, updating the software will solve the problem.
- As a last resort, you can reset the device and install from scratch.
How to reset: Press the reset button on the back of the wifi range extender device while your device is on. There is a change in all LED lights and the device turns off and starts working again. Just press the rest button for a few seconds. After rebooting, you have to do the installation again.
Email me: wifiextenderexpert@gmail.com
Wouldn’t allow me to do anything without the password
Ask for it doesn’t seem to recognize it retype same thing
Can’t get to connect extender to WiFi finally got it to connect on phone but no internet connection